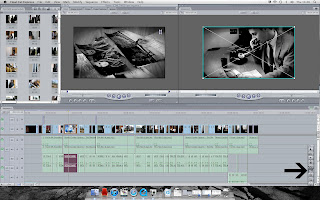
We did all of our editing in Final Cut Express. Here are some of the vital stages of our editing process. If we wanted to make a clip black and white we would select the clip we wanted or in our case if it was the whole movie shift then select the first and last clip. Then by selected effect, video filters, colour correction and then colour corrector. This then enabled us to adjust the level of black and white in our clip. This is a screen shot of the black and white tool. We used this to make the clips in our film into black and white. We used black and white because it is a main convention of film noir and we think it worked well with our clips. To make our clips black and white we dragged the saturation of the clip all the way down to 0. This meant that no colour would be visible in this clip. If the clip was particularly bright or we wanted to make it more shadowed and eerie, we made the contrast higher at this stage which would enhance any shaded areas, making the clip more 'black and white' rather than grey. When editing our film in to black and white we edited each clip individually because we found that each clip had different levels of brightness and if we had used the same level of black and white on all of our clip the brightness and contrast would have changed throughout the clips.
 When we came to edit our clips we had noticed that we had filmed extra either side of the main action. We needed to get rid of this extra footage in order for the clips to link smoothly and make sense. To do this we selected the clip we needed to cut, then clicking the cut tool on the tool bar reselecting the part the start and the end of the clip we wanted to delete. Changing the curser back to the ordinary mouse again, selecting the section to be deleted and then pressing the delete button on the key board. This proved really helpful in the making of our film and helped us distinguish the part in which we need to add transitions.
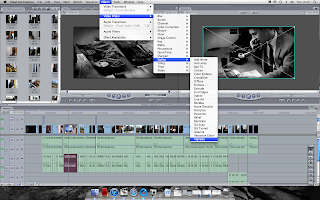
  Finally the last thing we did do our clips to make them seem more old fashioned and in keeping with the theme of film noir was add the effect 'Vignette'. This blurred the edges of the clip. We decided that although the black and white effect looked good and worked well fitting in with the conventions of film noir. Our film needed something more than just black and white. We decided to add another effect to our clip. 'Video Filters' allowed us to experiment with different effects. Then we chose one under the section 'Stylize and the filter right at the end called 'Vignette'. As you can see it gives the image a darker edge and looks better.

No comments:
Post a Comment